Lots of time we have seen every body write product Reviews, Feedbacks, or Videos.
May be each time visitor look that blogger earns money for posting that stuff.
You may heard form friends, or may be seen on internet on some website, for online advertising, like so many companies runs advertising network. Most popular is Google Adsense, then widgetbucks etc.
Now lets say as we are talking about writing articles and earning money ???? How ??
So there are many Company one is Pay Per Post which means they pay you for writing articles.
The basic concept says Sponsored Writing. I had seen in Pay Per Post website, where have to register blog and it takes some days to approve your blog , because they go through so many parameter, like Google Rankings, Alexa Ranking, your Blog Category, etc. and if every thing good then they approve it , then on that website you will find
Opportunity -- which means on that page you can find that many company post there new product or may be they sponsor you for writing there article , or review there website.
There are some other website also who also runs that concept.
1. http://www.sponsoredreviews.com/
2. http://www.socialspark.com/
3. http://www.smorty.com/
and as explained earlier the another website is www.payperpost.com.
Custom sharing
MacSpeech Dictate
 MacSpeech Dictate
Built Especially For The Mac
Mac users expect only the best from the applications they use on their Macs. MacSpeech Dictate was built from the ground up to ensure the ultimate experience on Mac OS X.
Amazing Accuracy
MacSpeech Dictate will astonish you with its accuracy. You simply talk and leave the recognition to MacSpeech Dictate. MacSpeech Dictate recognizes and understands 13 English language variations, nine with U.S. spelling and four with U.K. spelling.
More Info. Go to MacSpeech
Labels:
Mac Review
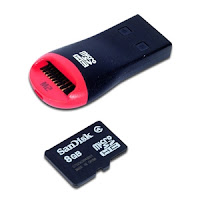
Installing OSX Leopard in SanDisk-8GBMicroSDHC Card

in

Hay friends this is my latest article for installing Leopard in 8GB MicroSD Card...... Sounds bit new yes! its new
Last sunday i was thinking that everybody had tried to install in usb drive and in there laptop but now i am going to show you how you can install mac os in your 8GB-16GB MicroSD Card, its very simple...
My hardware was bit Complicated its HP DV 9820EA(HP DV9000) AMD 64X2 Turion and i had tried all os destros but never found luck, because of nforce or watever, every time i found only one error " Still Waiting for Root Device", which i am sure every one is geeting so, what i thought to install mac in SanDisk-8GBMicroSDHC- Card..
Hardware U Need .............. 1. 10.5.2 TO 10.5.4 any Leopard Copy, i had used Leo4All V2 10.5.2
2. SanDisk-8GBMicroSDHC Card or any card i had used the same 8gig card
3. I was using HP DV9820EA( AMD 64X2 Turion) notebook--- HP DV9000 series
now we are ready to start the installation....
1. Put the card in usb or directly into the card slot and dvd in the laptop or dasktop and start the installation by booting up form the dvd press F8 and press -v then installation will start, let the dvd load every thing...
2. Now once the file load it will show the welcome screen to select the Languages so select your language and press the next btn. now go to the disk utility and in the disk utility you will see your usb drive, ur 8gig card so select it and format it with Mac OSX Journel Partition, so format your USB Card...
3. Now press next and you will find the options for selecting Your drivers, so select nforce test which work for my laptop and also select NTFS drivers , then select your sound and display drivers and then select your ethernet drivers that you want for installation. Now in the installation just select language tools that u need only just deselect all fonts and other language translator tools, so that you will be getting enough space.
4. Now press and wait for the installation to complate. it will take 25-30 mins to complete....
5. If the installation was successfull the computer will restart , so when the computer restarts just go to bios and in the boot priority select your usb volume(Gneric Drive-- someting like that ) and save the settings
6. Now the computer will restart and you will see the pc will boot form the usb pen drive so , press F8 and type -v so that you will see the files will load again for a while and then
congratulation , finally you will move to welcome screen so now select your country and finish all the settings and you will be through from the setting and hopefully you will see the mac osx screen......
----->>>>>> Its too good for me cause its in memory card and i had another desktop too so what i need to do is just take the card and put in another desktop card reader and just need to boot form card that's it and it start to work and yes it also recognised my other partition so its easy for data transfters...
Enjoy and wait for Installation Videos..............
Please wait for the installation video , i am going to upload soon..... Thanks
Subscribe to:
Comments (Atom)